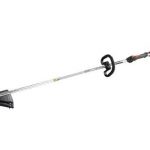
In my last article on string trimmer maintenance, I discussed a seasonal schedule program for maintaining a string trimmer. In this article I will be discussing how to perform maintenance including replacing the trimmer line, fueling a gasoline-powered string trimmer, checking and replacing the air filter, adjusting the idle, cleaning and replacing the spark plug.
Replacing the Trimmer Line
As time goes by as you use your trimmer, the cutting line will need replacing. There are several ways to replace the line depending on whether the trimmer is a single or dual-line model. It also depends on the kind of line being used. There are precut pieces of line, a pre-wound spool, or you will have to wind the line yourself.
It is advised that you check with the owners’ manual for instructions and be sure that you use the proper kind of trimmer line.
When you replace the line, you can use the opportunity to also clean the cutting shield and the area around the trimmer head. You should also take the time to inspect the head for damage and wear. If the head is damaged, you can replace it yourself. Be sure to use parts that have been approved by the trimmer’s manufacturer.
Owners of string trimmers have learned that it is a good idea to keep extra line on hand so you don’t have to rush to a store and buy it while you are doing work. Another tip is that some trimmers allow you to used different types of line or spools. The convenience of that is obvious.
Fueling a Gasoline-Powered String Trimmer
It is imperative that the proper fuel and additives be used in your trimmer. Check with the owners’ manual concerning the type of fuel and additives to use. Always use fresh fuel and understand that pumped gasoline can degrade over time. To keep the gasoline as fresh as possible, store it in an airtight container that is specifically designed to hold gasoline.
Check and Replace the Air Filter
Checking and, when necessary replacing the air filter is essential in keeping the trimmer working in top condition. Steps to take to check and replace the filter are:
· Step 1 – Make certain that the trimmer is off and parts are not in motion.
· Step 2 – Remove the spark plug wire from the spark plug.
· Step 3 – Remove the air filter cover and filter.
· Step 4- Check the filter for dust, debris, and damage.
· Step 5 – If the filter is not reusable, then replace it with a new one. If it is reusable, check with the owners’ manual on how to clean it.
· Step 6 – Install the filter and connect the air filter cover.
Adjusting the Idle Speed
You may at one time or another need to adjust the idle speed because the engine may stall when the trimmer is in idle. In addition, some models of trimmers may require you to adjust the idle so that the cutting attachment does not rotate. Some trimmers include a single idle adjustment screw. Others use multiple screws. Check the owners’ manual on how to properly use the screw or screws to adjust the idle on the trimmer you own. To adjust the idle, the trimmer should be working so the spark plug wire needs to stay connected and wear protective gear when performing this task.
Clean or Replace the Spark Plug
It is imperative that the spark plug be clean so that the trimmer works properly. It is also important to periodically check the plug for damage. Steps to take to expose the spark plug for cleaning or replacement are:
· Step 1 – Make sure that the trimmer is off and that all parts are not in motion.
· Step 2 – Follow all pre-maintenance tasks the owners’ manual specifies.
· Step 3 – Remove the spark plug cover and wire from the end of the plug.
· Step 4 – Clean the area around the plug to prevent debris from falling into the engine’s combustion chamber when the plug is removed.
· Step 5 – Use a spark plug wrench or a socket wrench with a spark plug socket to loosen and remove the plug.
· Step 6 – Inspect the plug. The tip should be intact and gray in color. It should not be covered with oil.
· Step 7 – If the spark plug is dirty, clean it. If it is worn or damaged, purchase an approved replacement.
· Step 8 – Inspect the gap distance at the end of the spark plug using a spark plug gap tool or feeler gauge. Adjust the gap if necessary.
· Step 9 – Install the plug and tighten until it is snug.
· Step 10 – Reconnect the spark plug cover and wire.
Next time, adding and changing the oil.


