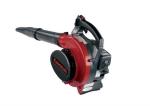
Changing the fuel line on a blower is a simple yet necessary lawn care task. It is easily accomplished and requires nothing more than oil grease, a pair of needle nose pliers, and a fuel line kit. Below, we review the steps required for this procedure.
Before getting started, make sure to drain out any and all of the fuel that might be lingering in the blower. Then, pull the grommet out (it is located above the fuel.) Using a set of pliers, pull out the lines to the carburetor and take out the old fuel line kit.
Once you have your lines in place, feed the filter into the tank of the blower and place the grommet into its hole. This requires strong fine motor skills and you may need to use your needle nose pliers for this task (again, be careful not to poke holes into the lines.) Finally, add fuel and hit the primer. If the lines have been secured properly, you should be able to witness the fuel entering the tank.
Changing the fuel line of a blower is a bit tricky and requires some delicate maneuvering. However, by following these steps you should be able to complete the task. For further information on changing the fuel line of a blower, watch the lawneq.com YouTube video.


