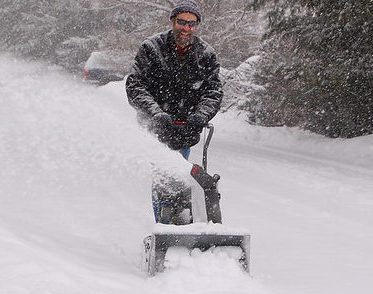
Let’s face it! When the winter comes and you have to deal with removing snow from your driveway, pathway, and curb, then the most essential lawn care power equipment you can have stored in your garage is a snow blower.
Of course, the main advantage of a snow blower is that you don’t have to use a shovel to remove snow. Using a shovel to remove heavy snow can be an issue for your heart. The effort of shoveling snow off of a driveway, pathway, and curb can be a strain on your heart. It’s best not to go there. And so the best alternative for removing snow is the snow blower.
In order for the snow blower to work properly over time, you will be required to clean elements of it including the carburetor, the gas line, and gas tank. Keeping these parts clean is essential to assure that the blower works properly every time you use it. It also assures that you have a well working machine for a long period of time.
We will be offering a three part series that describes how to clean the most important segments of a snow blower.
In part I we will focus on cleaning the carburetor. Part II will focus on cleaning the gas line. Part III will cover cleaning the gas tank.
Cleaning The Carburetor
Cleaning the carburetor can take some time, but it is essential. Assuring that it’s clean means that you minimize starting problems, you achieve better idling, the machine won’t “stumble” when you accelerate it, fuel consumption is minimized, and you prevent flooding of the carburetor.
It is advised that you refer to the snow blower’s owner’s manual before tackling the job. Reading the manual will familiarize you to the workings of the machine. The manual usually accompanies the snow blower when you buy it. If you don’t have a manual, you can get one from the website of the snow blower’s manufacturer.
Cleaning the carburetor involves a number of things. They include:
• Inspecting the air filter.
• Collecting the proper tools to perform the task.
• The process of cleaning the carburetor.
Actually cleaning the carburetor takes 10 steps:
1. Assuring that the engine isn’t running.
2. Removing the carburetor bowl.
3. Removing the float bowl
4. Removing the flathead
5. Spraying the carburetor with carburetor cleaner.
6. Cleaning the bowl.
7. Scrubbing the nuts.
8. Cleaning the holes on the carburetor.
9. Blowing out any leftover debris.
10. Reassembling the carburetor.
Preparation
Once you have read the owner’s manual to familiarize yourself with the machine, then you can start the preliminaries of the project.
Start off by inspecting the air filter. The air filter captures dirt and other debris assuring that most of that stuff doesn’t actually get inside the carburetor. When the air filter is dirty, clean air can’t get into the snow blower. As a result, it won’t function properly. So, as you can see, it is essential either to clean or replace a dirty air filter.
Next, you will need to collect the tools you’ll need to clean the carburetor. The tools include:
• A socket wrench
• Copper wire
• A compressed air can
• Liquid carburetor cleaning solution
• Wire brush
• Cloth
• Sandpaper
Step-By-Step Instructions
1. Assure the engine isn’t running: If you proceed to clean the carburetor when the snow blower is in the garage, then chances are the machine is not running. If you decide you want to perform the task after you have removed snow, then turn off the snow blower engine. It’s possible that after working the engine will be hot, so after you turn it off let it sit for a while to let it cool off.
2. Remove the carburetor bowl: Take the socket wrench and use it to remove the adjustment nut of the carburetor bowl. Once removed the bowl will come off. Inspect it. Check the gasket to make certain that it’s in good condition. If it’s worn, replace it. Check the bowl to assure it’s not cracked or has any other damage. If you discover debris in the bowel, then that’s an indication that the carburetor is dirty. Clean the bowl.
3. Remove the float bowl: Use your hands to remove the needle and pin of the float bowl. Be careful that you don’t lose any of the pieces. Once the needle and pin are removed, remove the bowl. Shake it and listen for any debris. If you hear debris jumping around in the bowl, then replace it with a new bowl.
4. Remove the flathead: Some people attempt to remove the flathead with the wheel. That could be a problem. Instead, remove the wheel to gain access to the carburetor.
5. Spray the carburetor with carburetor cleaner; Once you have access to the carburetor, you can clean it without removing it. Leave the carburetor in place, lie on your back and spray the cleaning solution onto the carburetor. Use a cloth to wipe away any stuck debris. If you discover that the carburetor is too dirty or you can’t clean it efficiently from your back, then remove it. Place it into a bowel of liquid carburetor cleaner and let it soak for about an hour. Remove the carburetor from the solution and rinse it with water.
6. Clean the bowl: Use the cloth and some cleaning solution and clean the carburetor bowl by hand. If your blower is old, then you may discover rust in the bowl. Use sandpaper to remove the rust and any other debris.
7. Scrub the nuts: Check to see if there is any residue dirt on the nuts of the carburetor. If so, spray the nuts with the cleaning solution and scour the dirt off them with the wire brush.
8. Clean the carburetor’s holes: Check to see if the holes are tarnished. If so, clean them with the copper wire. Also don’t forget to clean the carburetor’s throat. Spray cleaning solution into the throat to wash out any debris.
9. Blow out leftover debris: Use the compressed air can to blow out the holes to assure that all the dirt and debris is removed.
10: Reassemble the carburetor. When reassembling check the gaskets for any damage. You may find some if your blower is old. If there is damage, replace with new gaskets. Don’t forget to apply a little oil to the gaskets before placing them. The oil will help preserve them.
Keep the manual nearby as you perform this project so that you can refer to it when necessary. It will help you in the disassembly and the reassembly of the carburetor and in identifying parts of the blower.
It might be a good idea to photograph what you do with a digital camera to document your activity. The images will help you perform this task the next time you do it.
(Source: workhabor.com)


